Ok, so lets start with some arbitrary American stuff...
I built this Southern Pacific Stock Car from drawings publish in Narrow Gauge Gazette. The model was built in styrene. the sides and frame was constructed board by board. The floor and roof are scribed sheet styrene. The truss rods are brass, and bogies/couplers are Kadee metal products. The doors can open and close, and they slide on rails made from brass rod. this was one of the last models I painted with enamel paints. I switched to acrylics completely. Ok, not completelely.. I love Model Master Metalizer paint to create metal effects... but I am going off topic...

by the way, this was also the 1st model I ever dared to weather... did not go too bad, I think... lol
the next model is a brass and wood model I also scratch built from plans in narrow gauge gazette. it is supposed to be of a logging railroad prototype... but I decided it will be C & O... brass frame, real wood deck and stakes. The ford pickup is a plastic kit I built, not sure of the maker. All I can remember is that the kit came in a small white box with a sticker printed with the details of the model.
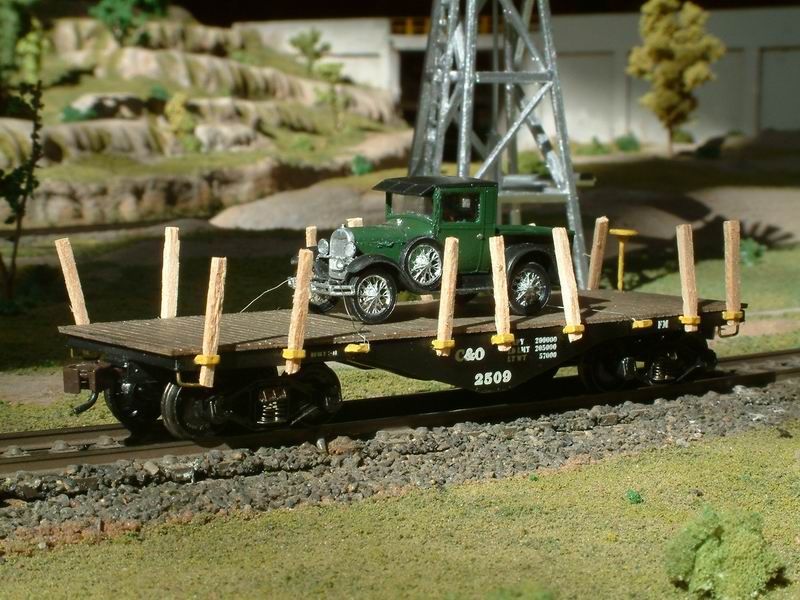
again, kadee couplers and metal bogies and wheels was fitted
The next model is an athearn blue box flat car. I only fitted the load, and applied some weathering, replaced wheels with metal and added kadee #5 couplers. quick, fun, saturday afternoon project... this is one of the models I run at the GFG meetings.
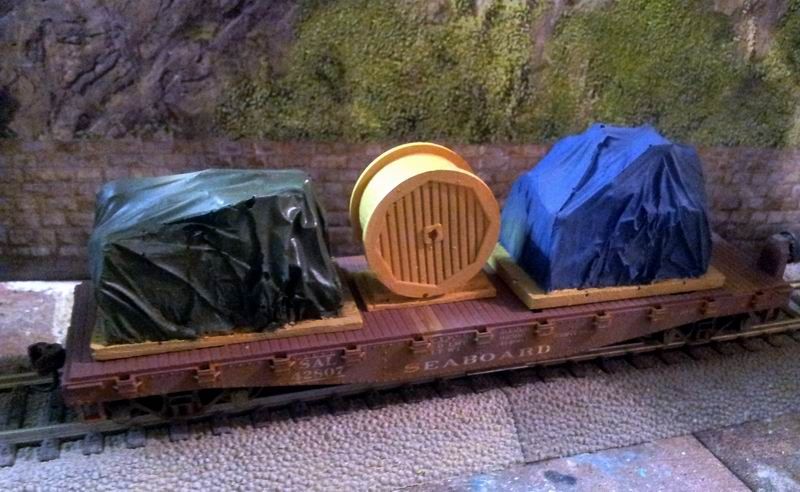
This model is no longer in my collection, I swopped it for 2 other cars... It is still used at GFG meetups, so I do get to see it occasionally... very little done here... again, metal wheels and kadee #5 fitted. I built the load with twigs collected from my back yard, and cut to size.
a Light dusting of road dirt, grime and dust, and a little rust here and there finished this model off. I am a big fan of weathering rolling stock and locomotives. when done in moderation, i think it adds so much, visually, to the model. I do like real rust bucket weathering also, but it should not be done to each car...
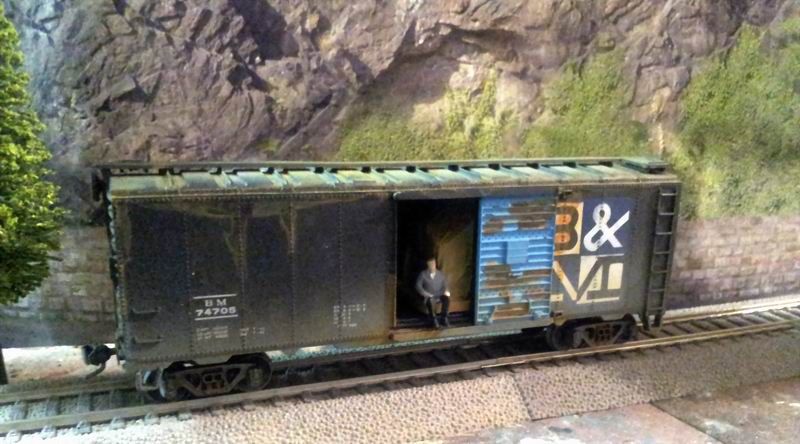
This B&M box car, is also an Athearn bluebox which was updated with metal wheels and kadee #5. I fitted a load, and opened the door, and placed the drifter figure taking a scorro-scorro (free ride). some light weathering was also done
up next I took this accurail covered hopper and fitted kadee #5 couplers. it was supplied with metal wheels which ran great, so I did not make any changes. this is mostly just a weathering project. I did the dust and grime first. clear coat when I was happy, then rust. again, clear coat when done. then graffitti and some touch up of the rust. and a last satin clear coat to seal it all in. I hand painted a couple of the hopper covers other colors (just visible) to represent lost/broken ones that were replaced with what ever was available... rust is done with a little burnt sienna pastel. I apply a small spot and then use a stiff bristle brush to brush the powder in a downward stroke from the spot, as it would run with rainwater. typical places for this type of rust would be around rivets, flaked paint, welding seams or any other place water might accumulate... I use sienna, orange and dark brown powder pastels for rust like this.

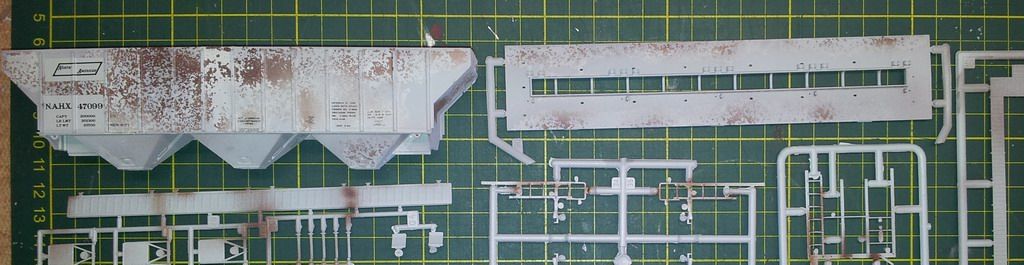
I apologise that I do not have a better shot of the following car. it is a proto2000 PS2-CD 4200cu.ft. covered hopper kit. it is factory painted and lettered, but unassembled. I decided to test a technique I learned to do flaking paint and rust, but did not want to repaint the whole model. so I inverted the process... the results are quite nice, and I am happy with the outcome. I wanted to represent an old car that changed owners. it has only the logo and numbers patched and repainted, and the rest of the car left unchanged...
to achieve this, I patched the bits I wanted to KEEP with masking tape. I then painted the rest of the car in a different shade of gray, and let it dry completely. the masking stayed in place for the next step. you need, a soft bristled paint brush, and water with a drop of liquid dishwashing soap, and a mixture of regular table salt and course salt.
using the brush, paint patches of the water mixture. then apply the salt mixture by sprinkling with your fingers where you DO NOT WANT RUST (this will be most of the model!) make sure you get loose grains in various places to get the spotty rust effect. leave the model to dry. when dry, carefully turn the model over, and repeat the process on the other side. handle the model very carefully, as the salt is only very very delicately sticking to the model. again, let it dry. once the whole model is covered in salt, and it is dry, it is time to move on. use a flat dark brown or slightly reddish brown paint and cover the model where you want rust (this should be in places with no, or scattered or very little salt. apply the paint very lightly and with low air pressure to not blow off the salt. when done, let it dry. (this is one of the reasons I switched to acrylics... drying times are a few minutes!!!)
when your paint is dry, use a stiff bristled brush, and brush off the salt, making sure you get it all. you should get the kind off effect seen above. a flat clear coat will finish the model you can accentuate some of the rust now with some pastel rust streaks and some dust and road grime in the lower parts of the wagon. depending on cargo, light streaks can also be bade from the loading covers down the sides...
this then concludes the arbitrary and random models. next is the models of my favorite road. the might BN/BNSF..
regards


