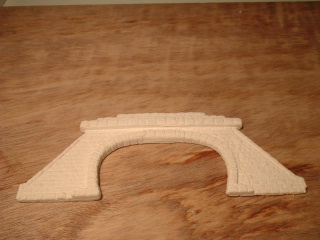
As I needed tunnel portals for my layout, I set out looking for some, but I couldnt find any with the required spacing. I did find some Faller stone portal that I liked, but they were too narrow.
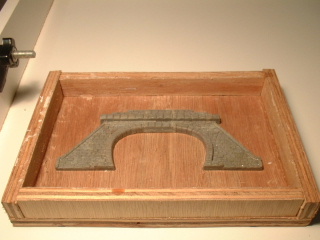
This gave me the change to do my first ever kit bashing and mould making. I spent some time doing this (bashing the master into being) but I think the results were good enough for my needs. I then made a box from plywood to house the master in. No problem there. I remembered an article I read in MODEL RAILROADER about making moulds using, among others, silicone. Of course I jumped right in and filled the box with silicone. I forgot to use something important and the reason I needed it became apparent soon I needed to use liquid latex as the silicone stuck to the master. Big time! I ended up with a broken master with lots of small pieces of silicone stuck to it. (Tip: the best tool to get these little pieces of silicone off is none other than an old toothbrush OK, I admit, I found that out by accident).
The master in the box
So, with my newfound experience and a fixed master, I set out to remake the mould. This time I made sure I went out and got the MODEL RAILROADER and had the article next to me while I made it. First the six layers of liquid latex generously brushed on (use an old brush its useless afterwards) and then a couple of layers of silicone (3-5mm thick at a time, otherwise itll never dry steep learning curve this one). All went well up to a point and that point was after I took the mould out of the wooden box. The latex came right off the silicone. Im no chemist but it appears that the latex and silicone dont bond too well. The silicone (flopped) mould flies well if you throw it across the garage though. So much for that.
The finished mould.
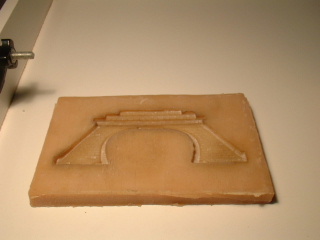
At this point I was ready to throw in the towel when a thought struck me: why not use just latex? I did just that poured the latex to the brim of the box. The master stayed whole after the second attempt because I read the article by now and the latex didnt stick to the master. A point of warning here: if you live in a damp and cold environment (I do believe Ireland qualifies for this I mean, theres a reason its so lush and green over here), it will take forever and a day to harden/dry. Central heating radiators can assist with the drying process if your 4-year-old son resists the urge to draw pictures in the slightly gooey drying latex (dont ask,
www.dont-go-there.com).
The result: a near perfect stony tunnel portal mould in the size required. But my woes were not over yet. I now had to cast some portals. Out with the newly acquired Woodland Scenics hydrocal, into the mould and on its way to the dustbin. This being my first time tried I tried my hand at hydrocal, it could just be I didnt get the mixture right. It seemed too powdery to me anyway. Down to the craft shop (the only darn shop in town thats remotely useful for a train modeller) and back with some casting powder. Dont ask me whats the difference between casting powder and plaster of Paris I dont know nor care. But casting powder works! I think I have the mixture sorted by now and four nights later I have enough portals needed for my layout. Im actually looking for ways to make more tunnels to justify more portals. The next step will be to stain it.
Hydrocal - don't have a clue why it didn't work.
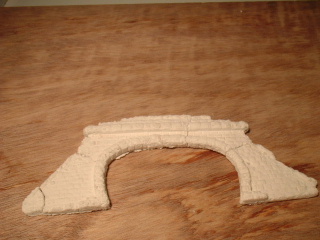
The result - casting powder.